Configure TM
Configure Squash TM properties
- Open the
squash.tm.cfg.propertiesfile located in the conf folder of Squash TM installation folder (ex: C:\Squash-TM\conf). - Find the line with
tm.test.automation.server.callbackurland uncomment it - Add the url of Squash TM (ex: http://192.168.2.138:8080/squash). This url will be used by Squash TF Server to notify Squash TM of the execution progress.
- Restart Squash TM.
Warning
The Squash TM URL used in this configuration should be accessible from Squash TF Server location
Warning
If you update this Squash TM callback URL, then don’t forget to update all the Squash TF execution server using this endpoint
Create a Test Automation Server user
In Squash TM there is a special user group called Test Automation Server which has the right to send automated test execution feedback to TM from the outside.
To link a Squash TM server with a Squash TF server, you have to create a user which belong to this special group. To do so :
In Squash TM, click on the link
[Administration](in the upper corner) then click on[Users].Add a new user with the button
[Add New User]. The[Add User]popup shows up :
In the
GroupComboBox chooseTest Automation Server.Fill the
Loginfield with the login you have configured in the Squash TFconf.propertiesfile.Fill the
Passwordfield with the password you configured in the Squash TFconf.propertiesfile.
Warning
The credentials of this user is used on Squash TF side to define the endpoint in the conf.properties. If you update the credentials of this user, then don’t forget to update the execution server endpoint which use it.
Add a Squash TF Execution Server to Squash TM
In Squash TM, click on the link
[Administration](in the upper corner) then click onAutomation serversAdd a new server with the button
[Add a server]The
[New test automation server]popup shows up :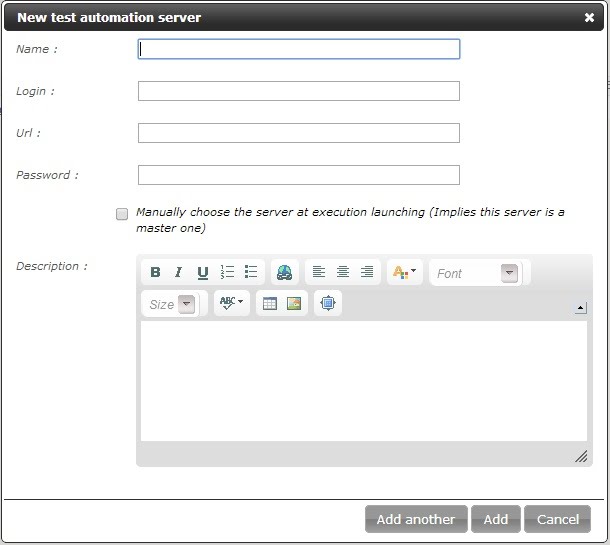
Fill the
URLfield with the Squash TF url (ex : http://192.168.2.138:9080/jenkins).Fill the
Loginfield with the login of the user in Squash TF dedicated to automation.Fill the
Passwordfield with the password of the user in Squash TF dedicated to automation.If you use a Master server with slave(s), you can check the
Manually choose the server at execution lanching (Implies this server is a master one)checkbox. This option will allow you to choose, each time you run your tests, on which agent they run.If you want to add another server, click
[Add another]and repeat steps 4-8, otherwise click[Add].Attention
Login must be unique for each URL.
Configure a Project to use automation
> Link an Automated Server to a Project
Click on the link
[Administration](in the upper corner) then click on[Projects].Select an existing project, scroll down to
Test automation management.
Click on
No server. You’ll see the list of available servers.
Choose the server and
[Confirm].In the
Test automation managementyou should see a new part calledJobs.
> Link a Squash TF job to a Squash TM project
Click on the link
Administration(in the upper corner) then click onProjects.Select an existing project with an automation server associated, scroll down to
Test automation management.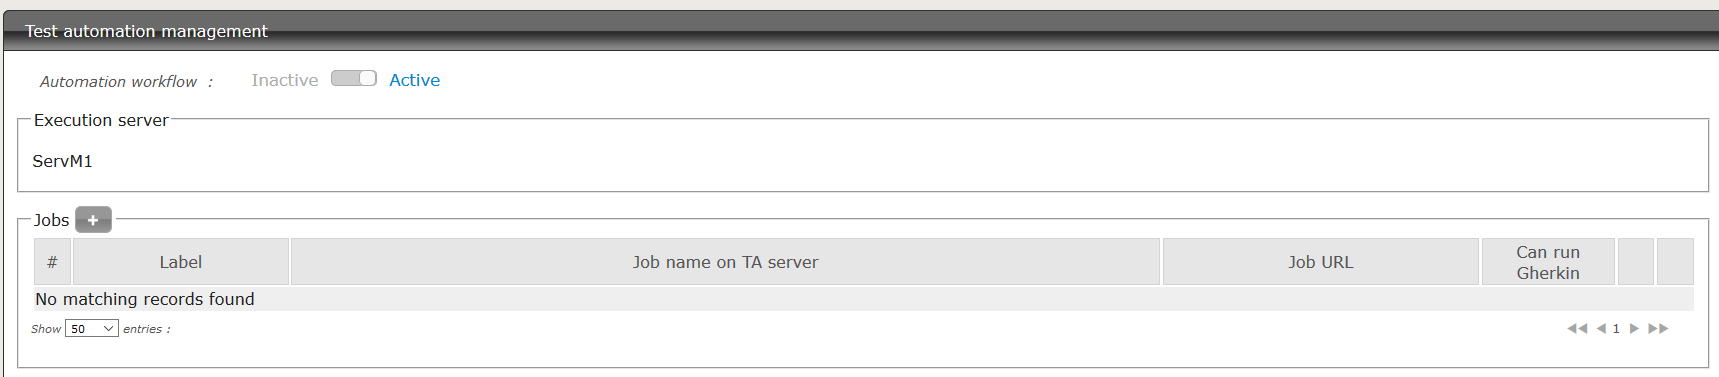
Click on
[+]. The New job popup will shows up with all the jobs you have in Squash TF.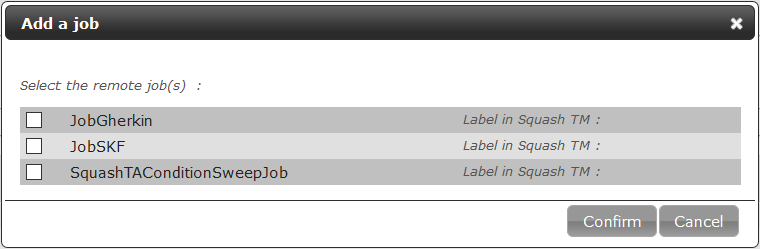
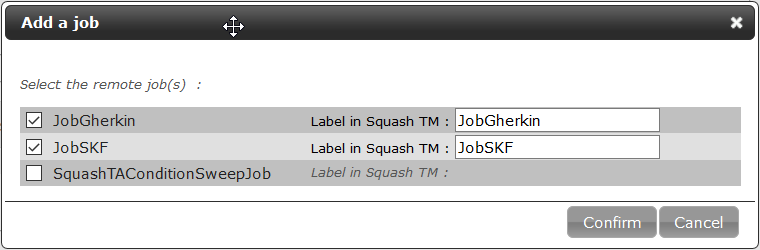
Select the job(s) you want to add. You can change their label in Squash TM (by default the name are the associated Squash TF job name).
Attention
Job’s name can’t be blank and must be unique.
Click
[Confirm].You can edit your job (pencil button) if you want to further configure it.
In the field
Possible execution servers, you can choose whichslavesservers can be used for this job. Type their name separated with semicolon (ex: SlaveServ1; SlaveServ2).Attention
The Possible execution servers field is only for SLAVES servers, the master will alway be displayed in the list of possible servers.
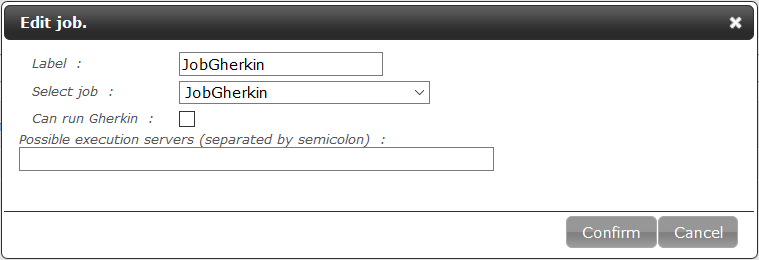
> Enable Gherkin execution for a job
When you linked a Squash TF job to a Squash TM project, by default in the job configuration in TM, the Can run Gherkin option is set to No. In order to this job can run gherkin you have to enable it.
In the project administration page section
Test automation management, edit your job (pencil button) :
Check the box
Can run gherkin
Click on
Confirm
Now the project is related to Squash TF server. In this project you can relate automated test script to TM test cases. You can then execute these automated tests from the campaign space and read their execution results.