Execution Agent installation
Squash TF Execution Server is Jenkins based. As such one can setup a master/slave architecture with clear separation of concerns. The Jenkins master schedules test related tasks whereas slave agents are solely responsible for their executions.
As the setting up of such architectures may be somewhat cumbersome, graphical agent installers are supplied as well as ready to run docker images.
Warning
In 2.3.0-RELEASE version of the server, we updated Jenkins to 2.190.1 version. Since 2.165 and newer version, Jenkins no longer supports the old (-remoting) mode in either the client or server. If you have installed a 2.3.0-RELEASE of the server and want to install an agent, you need to download 2.3.0-RELEASE (or newer) version of the agent.
Physical install
The graphical agent installers are meant for GNU-Linux-64 or Windows-64 environments. They will install and configure self-contained Jenkins Jnlp agents with Squash TF runners handling capabilities. More precisely they will :
- Declare on the Jenkins master a new Jnlp node.
- Retrieve the name and the secret of the created node.
- Install the self contained agent and create a launch script.
- Configure, on the Jenkins master, the newly created node properties such as the location of the embedded Maven.
Pre-requisites
The following pre-requisites are needed in order to perform the installation :
- An open port on the Jenkins Master (Squash TF Execution Server) that can be used by the agent to connect to the master.
- A Java Development kit 1.8 since, for licensing reasons, it is not possible to ship a our product with an embedded JDK.
- A Java Virtual Machine with the corresponding environment variables JAVA_HOME, JRE_HOME and PATH set to launch the installer.
- A Code source management client for the agent to retrieve tests sources code.
- If GUI tests are in order, provide a way to keep active the graphical session. This may be a technical user account with the correct rights on Windows machines, or a X11 virtual frame buffer on GNU-Linux machines.
Procedure
Both Windows and GNU-Linux installers work the same. We display here below the common procedure :
The installers come as executable jar. So either double-click on the the jar or run the usual command :
java -jar squash-tf-execution-agent-{version}-{os}.jar
where {version} is the actual version of your execution server and {os} the operating system the agent will run on. One is then greeted by the following screen. Select the desired language and click on the OK button.

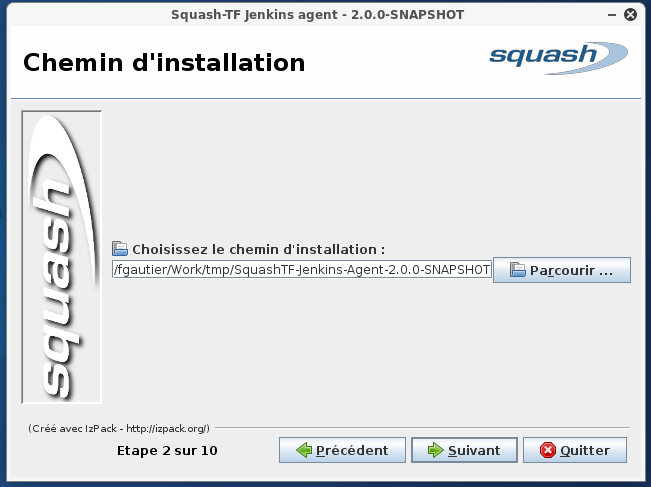
Fill in the installation directory and click on the next button.
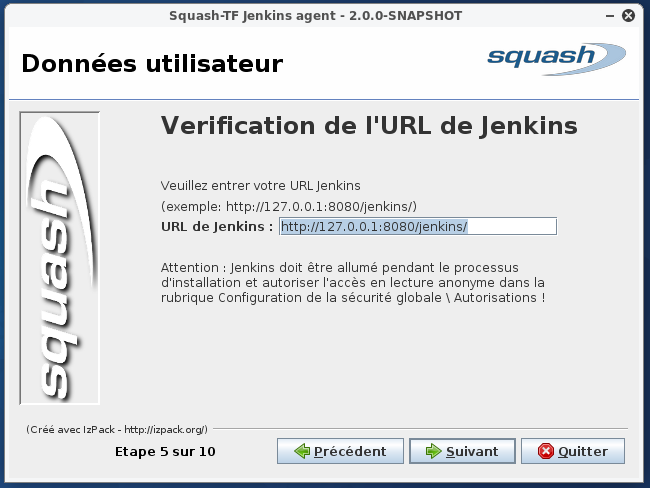
Go through various non-ambiguous steps until you’re prompted to fill in the URL of your execution server.
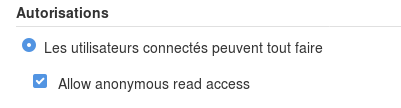
WARNING : Before going any further the Jenkins master should be configured so it allows “anonymous read access”. Indeed at this step the installer will try to interact with the Jenkins API. If anonymous reading is not allowed, the installer will consider that the given URL is false. To configure it :
- Log in administrator mode into Jenkins.
- Navigate to “Administer Jenkins/Configure global security”.
- In the “Autorisations” section, allow anonymous access reads.
Once this is done, come back to the installer screen and fill in the Jenkins URL.
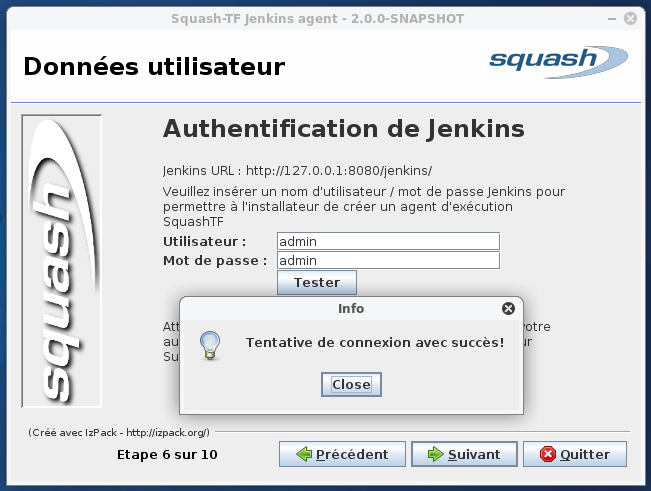
Fill in Jenkins administrator credentials, and verify the correcteness of the pair URL/credential by clicking the “Test” button.
Next the installer will perform the actual remote declaration of the node on the Jenkins master. Hence, the latter must be configured to accept remote control :
Navigate to “Administer Jenkins/Configure global security”
Autorise (temporarily) remote access to Jenkins CLI.

Fill in the port onto which Jnlp agents can connect.

Click the “save” button. An alert message should then appear stating that allowing remote access to the CLI is not safe. That’s normal. Just think to disable it after completion of this procedure.

Once this is done, come back to the installer screen and click “next”. The following screen states that everything went well.
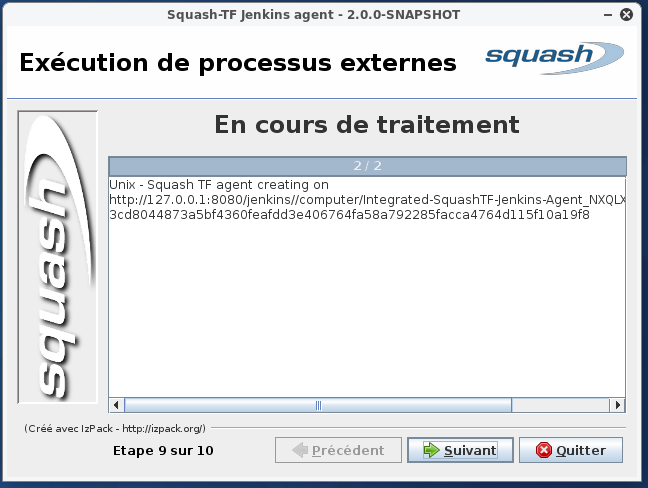
Go through the following steps until installation is finished.
The newly created agent node is now visible in the left Jenkins menu. It appears as disconnected. This is perfectly normal. Indeed the slave has not been launched yet.

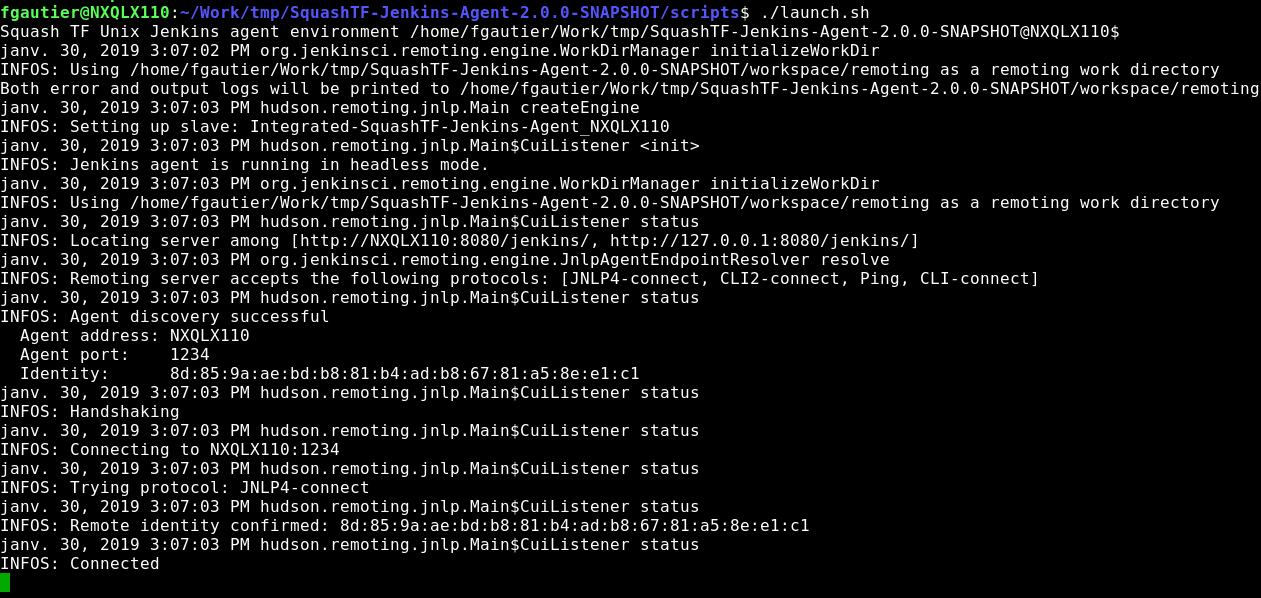
Launch the agent by executing either {install-dir}\scripts\lauch.cmd on Windows or {install-dir}/scripts/launch.sh on GNU-Linux, where {install-dir} is the directory one chose to install the agent. “INFOS: Connected” is then displayed on the console signaling that the agent is launched properly.
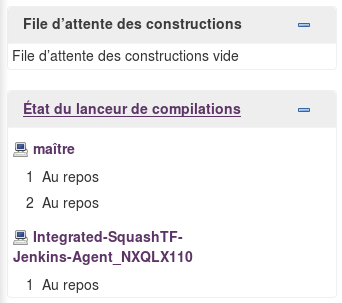
On the Jenkins master the created node appears now as at “rest”.
The procedure is reproducible for each agent node one wants to create. For security purposes, please ensure , once this is complete, to finally disable remote access to Jenkins CLI.
Docker setup
Those come in three “flavors” :
squash-tf-execution-agent : The base image.
It brings the tools needed to be ran as a Jnlp agent and run headless Squash TF test. The image is built on the the open-jdk image and is thus Debian based. The image includes a JDK, a Maven, a Git client, a Mercurial client. And last but not least it contains the jars and configured entry-point to run it as a Jnlp agent.
squash-tf-chrome-ui-execution-agent : Chrome-GUI testing specialized image.
This specialization provides additionally a working graphical session and comes equipped with a guaranteed compatible Chrome/Chromedriver couple. The graphical stack is built using Xvfb as a fully in-memory X-11 server. Hence no graphical components should be needed on the underlying machine servicing the Docker host and running the images.
squash-tf-firefox-ui-execution-agent : Firefox-GUI testing specialized image.
Same as the chrome-ui image but comes with a guaranteed compatible Firefox/Geckodriver couple instead.
Credits : The docker images with in-memory X-server implementation is heavily based on work done by Stephen Fox.
Pre-requisites
The following pre-requisites are needed in order to perform the installation :
- A Jnlp open port on the Jenkins Master (Squash TF Execution Server) that can be used by the agent to connect to the master.
- A Docker compatible operating system on the machine(s) where the images will be running.
- A valid Docker installation with a Docker host.
Procedure
The setup procedure is flavor independent [1]. For the sake of example, screenshots displayed below are those from a Squash TF Chrome-ui agent setup.
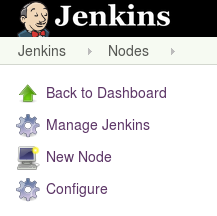
The first step is to declare a new node in Jenkins administration section. Go to “Manage Jenkins/Manage Nodes” and click on “New Node” on the left panel.
Fill in wanted agent name and select Permanent agent radio button.

- The images are built to use /home/jenkins/agent as the working directory. Thus fill in distant working dir section and Remote root directory with “/home/jenkins/agent”.
Add as many labels as you wish and a description if wanted. As the Jenkins documentation states : Labels (or tags) are used to group multiple agents into one logical group (..) Labels do not necessarily have to represent the operating system on the agent; you can also use labels to note the CPU architecture, or that a certain tool is installed on the agent.
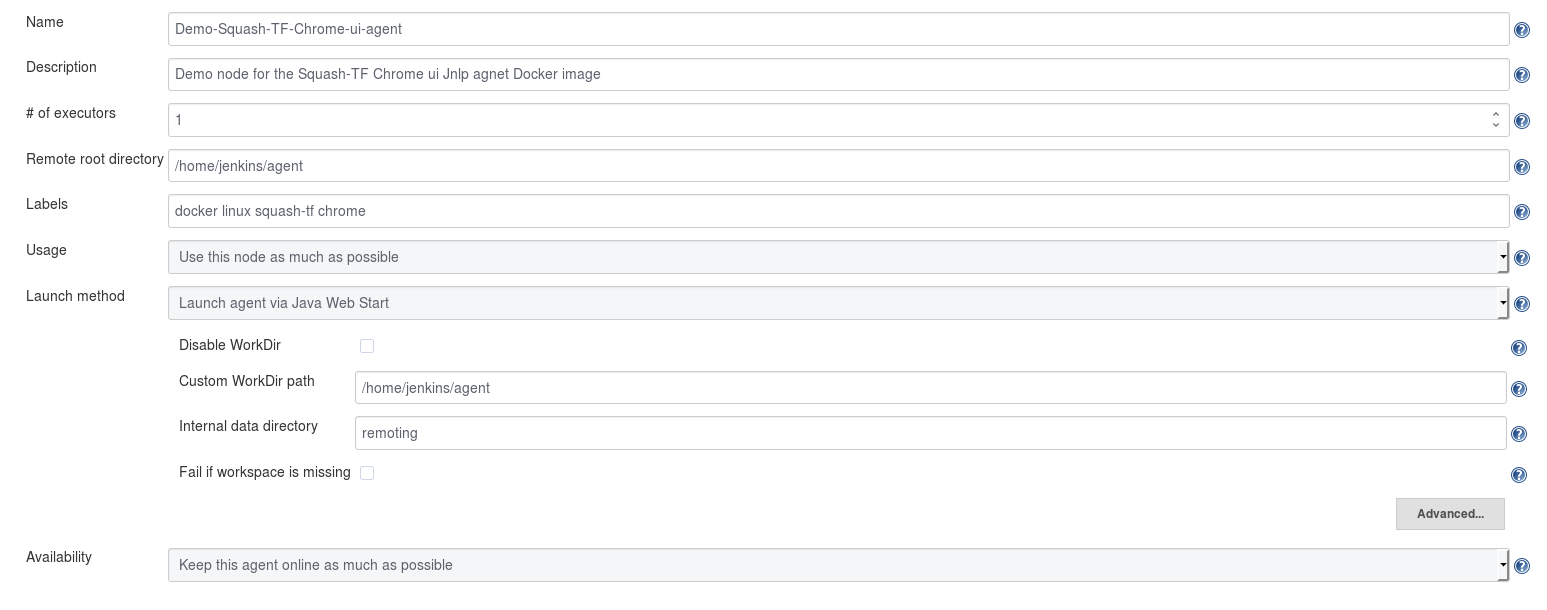
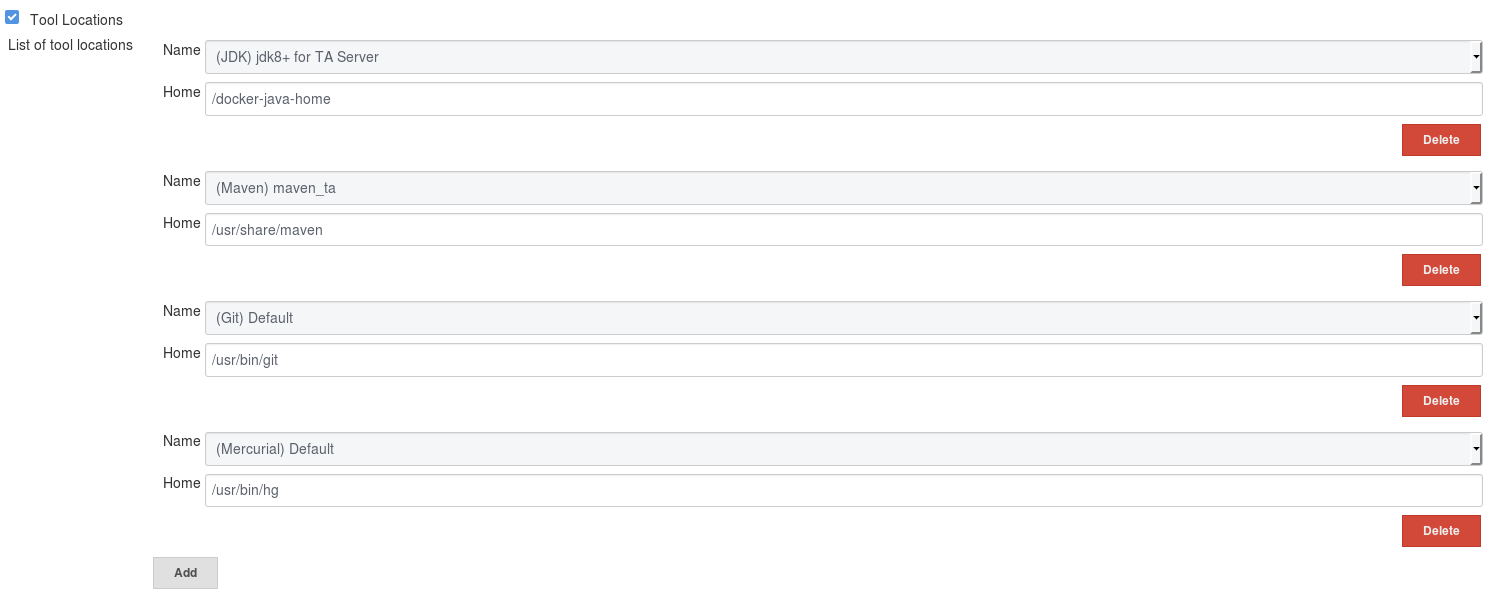
The agent may not share with the execution server vital – for Squash TF tests executions – tools locations. The aforementioned locations can be overridden using the dedicated section and the following values :
- JDK home : /docker-java-home
- Maven home: /usr/share/maven
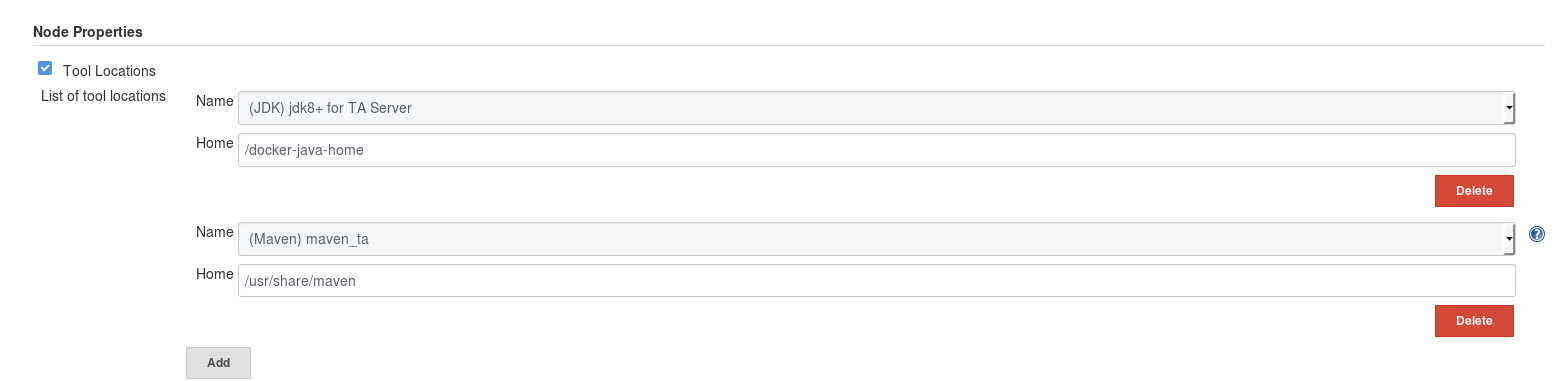
To further clarify tools locations Mercurial and Git are to be found at :
- Mercurial : /usr/bin/hg
- Git : /usr/bin/git
The agent may not share with the execution server vital – for Squash TF tests executions – environment variables. Yet, the aforementioned variables are already set in the dockerfile. Hence, there is no need to redefine them in the concerned section. Nonetheless, for information purposes, here are the values of a few of these variables :
- JENKINS_HOME : /home/jenkins/agent
- SQUASH_TA_HOME : /home/jenkins/agents
- MAVEN_HOME : /usr/share/maven
- MAVEN_CONFIG : /home/jenkins/.m2
- JAVA_HOME : /docker-java-home
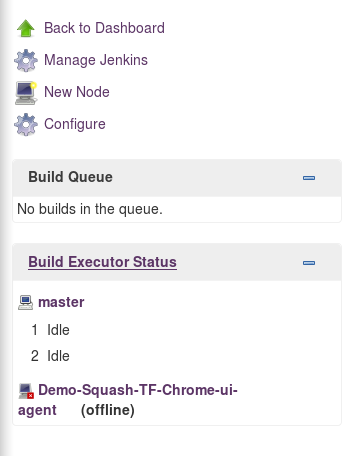
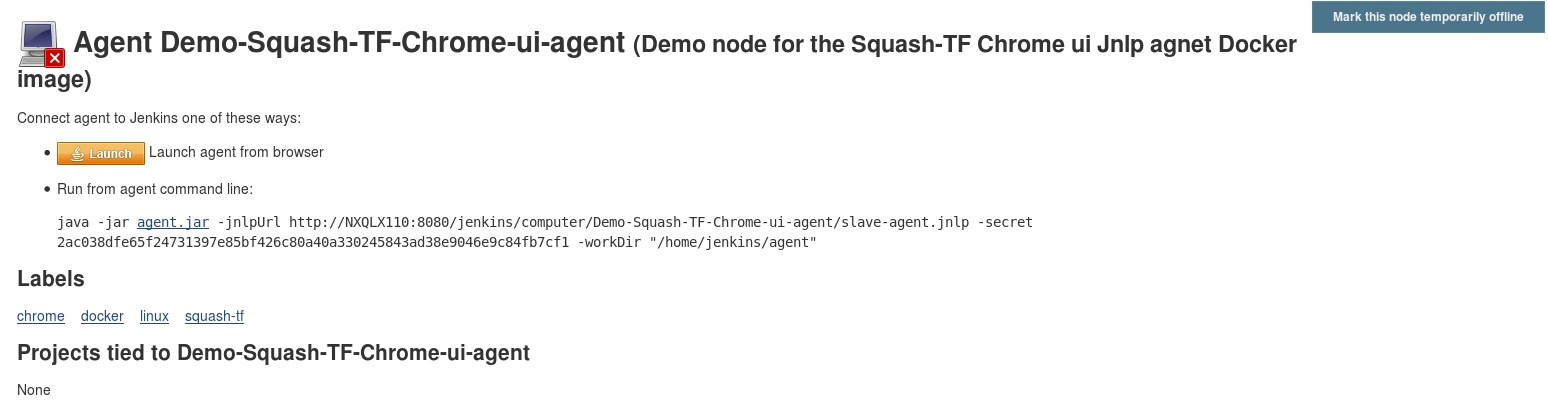
Click on the “save” button and note the secret of your newly declared node. The newly declared node should now appear as offline in the left panel.
Click on the newly created node to retrieve its “secret” phrase. It will prove necessary when launching the agent.
You’ve finished the node declaration. Now you now have to download the agent docker image. Two possibilities :
- using a docker images from dockerhub.
- using a docker images package as tarball from our artifacts repository.
>> Download the agent image from dockerhubTo donwload the desired image :
docker pull squashtest/squash-tf-{flavor}-execution-agent.docker.{version}
where {flavor} corresponds to the type of agent you’re interested in and {version} is the version of the agent. We recommend you to choose the version corresponding to your Squash TF execution server for full compatibility. For the sake of information, the Jnlp agent jars used to build the base image are the one provided by Jenkins itself.
>> Download the agent image from our artifacts repositoryDownload the desired image here. Alternatively one can access the image directly from our repository using :
wget http://repo.squashtest.org/distribution/squash-tf-{flavor}-execution-agent.docker.{version}.tar
where {flavor} corresponds to the type of agent you’re interested in and {version} is the version of the agent. We recommend you to choose the version corresponding to your Squash TF execution server for full compatibility. For the sake of information, the Jnlp agent jars used to build the base image are the one provided by Jenkins itself.
Load the downloaded docker image in your set up using the following command :
docker load -i squash-tf-{flavor}-execution-agent.docker.{version}.tar
where {flavor} corresponds to the type of agent you’re interested in and {version} is the version of the agent.
It is to be noted that one should “NOT” use the docker import command as it will flatten all layers and will render unusable the image.
The image should now be visible in your available docker images. This can be checked using :
docker images

Finally run the docker image using :
>> For the image from dockerhub
docker run --name demo-tf-agent --user jenkins --env "JENKINS_AGENT_NAME={agent_name}" --env "JENKINS_SECRET={secret}" squashtest/squash-tf-{flavor}-execution-agent:{version} -url http://{jenkins_url}
The command should be understood as following :
- docker run : Runs a docker container.
- –name demo-tf-agent : The nickname of the container that will be created. Can be chosen to one’s liking. If not set a random name will be assigned to the container.
- –user jenkins : The technical user with proper rights to run Jenkins.
- –env “JENKINS_AGENT_NAME={agent_name}” : Enables one to specify the name of the declared node in Jenkins. Modify {agent_name} accordingly.
- –env “JENKINS_SECRET={secret}” : Enables one to specify the secret of the declared node in Jenkins. Modify {secret} accordingly.
- squashtest/squash-tf-{flavor}-execution-agent:{version} : Selects the image one wants to run, where {flavor} is the type of image one is interested in and {version} the version targeted.
- -url http://{jenkins_url} : Enables one to specify the URL of the Jenkins master server.
>> For the image from our artifact repository
docker run --name demo-tf-agent --user jenkins --env "JENKINS_AGENT_NAME={agent_name}" --env "JENKINS_SECRET={secret}" squash/squash-tf-{flavor}-execution-agent:{version} -url http://{jenkins_url}
The command should be understood as following :
- docker run : Runs a docker container.
- –name demo-tf-agent : The nickname of the container that will be created. Can be chosen to one’s liking. If not set a random name will be assigned to the container.
- –user jenkins : The technical user with proper rights to run Jenkins.
- –env “JENKINS_AGENT_NAME={agent_name}” : Enables one to specify the name of the declared node in Jenkins. Modify {agent_name} accordingly.
- –env “JENKINS_SECRET={secret}” : Enables one to specify the secret of the declared node in Jenkins. Modify {secret} accordingly.
- squash/squash-tf-{flavor}-execution-agent:{version} : Selects the image one wants to run, where {flavor} is the type of image one is interested in and {version} the version targeted.
- -url http://{jenkins_url} : Enables one to specify the URL of the Jenkins master server.
Warning
The difference between the 2 run command is in the image name. The dockerhub one is squashtest/squash-tf-{flavor}-execution-agent:{version}, the other is squash/squash-tf-{flavor}-execution-agent:{version}
Once done, the node should appear as online on the Jenkins interface and its build queue should be in “idle”.
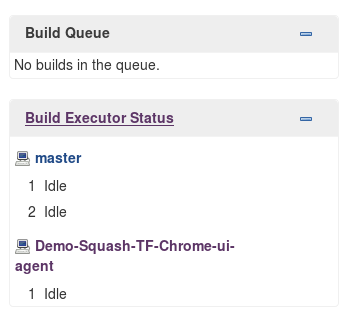
The agent is now ready to execute its first Squash TF tests.
Particularity of graphical session providing docker images
The docker images with X11 have some particularities :
The latter images can be ran in “debug mode” using the –x11 vnc-debug option. In such a mode a VNC (Virtual Network Computing) server is also launched allowing remote access to the graphical session of the running container. If launched the server listen on port 5900. One should thus bind the container 5900 port to a physical port of the machine hosting Docker. The full command is then :
docker run -p 5900:5900 --name demo-tf-agent --user jenkins --env "JENKINS_AGENT_NAME={agent_name}" --env "JENKINS_SECRET={secret}" squash/squash-tf-{flavor}-execution-agent:{version} -url http://{jenkins_url} --x11-vnc-debug
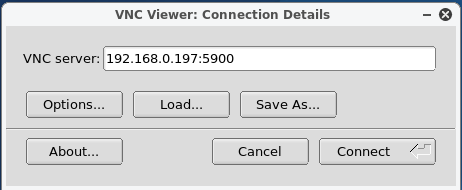
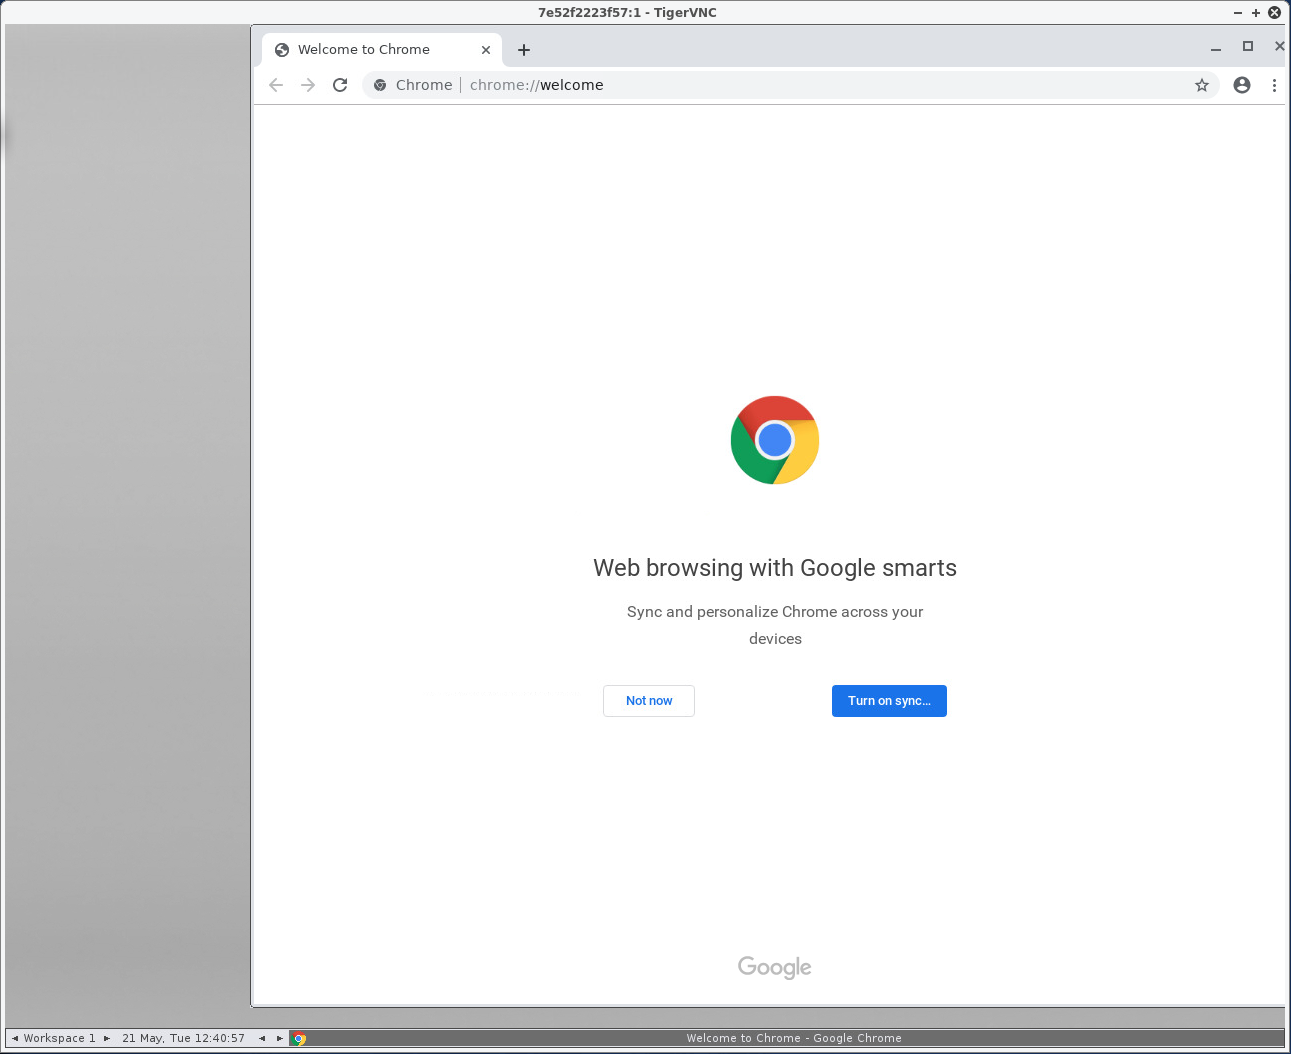
Once the container launched in debug mode, its graphical session can be accessed using a VNC client targeting the Docker hosting machine on the binded port. For example using vncviewer :
Due to Chrome own limitations the user running it shoud be “Privileged”. This can be set using the –privileged options in the docker command. The command to run the Chrome flavor of the agent is then :
docker run --name demo-tf-agent --user jenkins --privileged --env "JENKINS_AGENT_NAME={agent_name}" --env "JENKINS_SECRET={secret}" squash/squash-tf-chrome-ui-execution-agent:{version} -url http://{jenkins_url}
Both of these options can be run simultaneously.
Troubleshooting
Here is a non exhaustive list of possible slight configuration/integration issues.
Problems linked to tools : Java, Maven, git, mercurial is not found, problems while checking out project, etc… Jenkins master tools configuration may be interfering with the agent one. Try overriding their location using the “tools location” section in the node configuration page on Jenkins.
Something is wrong with the environment, cannot find any parasable pom, working directory is weirdly set. Jenkins master environment variables configuration may be interfering with the agent one. Try overriding their values using the “environment variables” section in the node configuration page on Jenkins.

- Jenkins is not reachable since it is behind a firewall. Use the Jenkins anticipated mechanism and specify the environment variable –env “JENKINS_TUNNEL : HOST:PORT” for a tunnel to route TCP traffic to Jenkins host, when jenkins can’t be directly accessed over network
- Our own tests revealed that too many layers of virtualization may render the use of the images unstable. For instance we found that on our setup, trying to run the images on the “virtualization sandwich” Windows 10/Virtualbox/Debian 9/Docker results in an immediate crash of the container without any further ado.
Time problems in reports. By default our containers are in UTC. This could lead to unexpected time value in the produced reports. You could solve this problem by specifying a timezone in your docker run command line. Example :
--env "TZ=Europe/Paris"
When you execute a test with a job using the Chrome agent which fails when it tries to open Chrome, and you have an error stack which looks like :
org.squashtest.ta.framework.exception.InstructionRuntimeException: Junit test execution for [engine:junit-jupiter]/[class:XXX]/[method:YYY] failed on error : unknown error: Chrome failed to start: crashed
(unknown error: DevToolsActivePort file doesn't exist)
(The process started from chrome location /usr/bin/google-chrome is no longer running, so ChromeDriver is assuming that Chrome has crashed.)
Then have you run your container in privileged mode as explain in the doc ? See : Particularity of graphical session providing docker images
| [1] | No evident link has been found with Quantum Chromodynamics. Yet, we let the demonstration of the invariance under SU(3) transformations as an exercise to the reader. |