Use a job based on Java Junit runner job template
Selecting the job
Once you’ve created a job using the Squash-TA Template, select it in the list of jobs available :
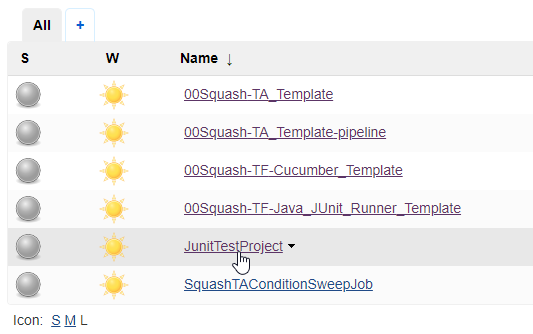
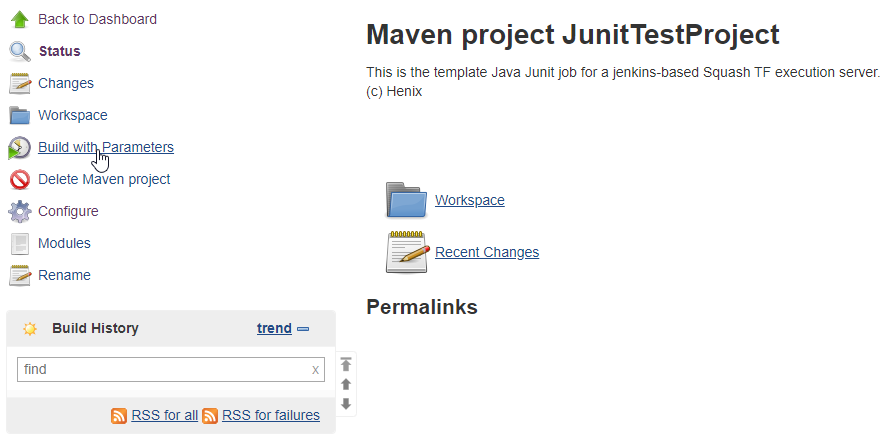
On the job’s page, you’ll be able to launch a build, access various informations regarding the job or make modifications.
Note
You’ll have to be logged in as an administrator to modify your job (rename, delete or configure) or to launch a build.
To launch a build, click on ‘Build with Parameters’ :
Setting the parameters of the build
You can then configure some of the parameters of the build :
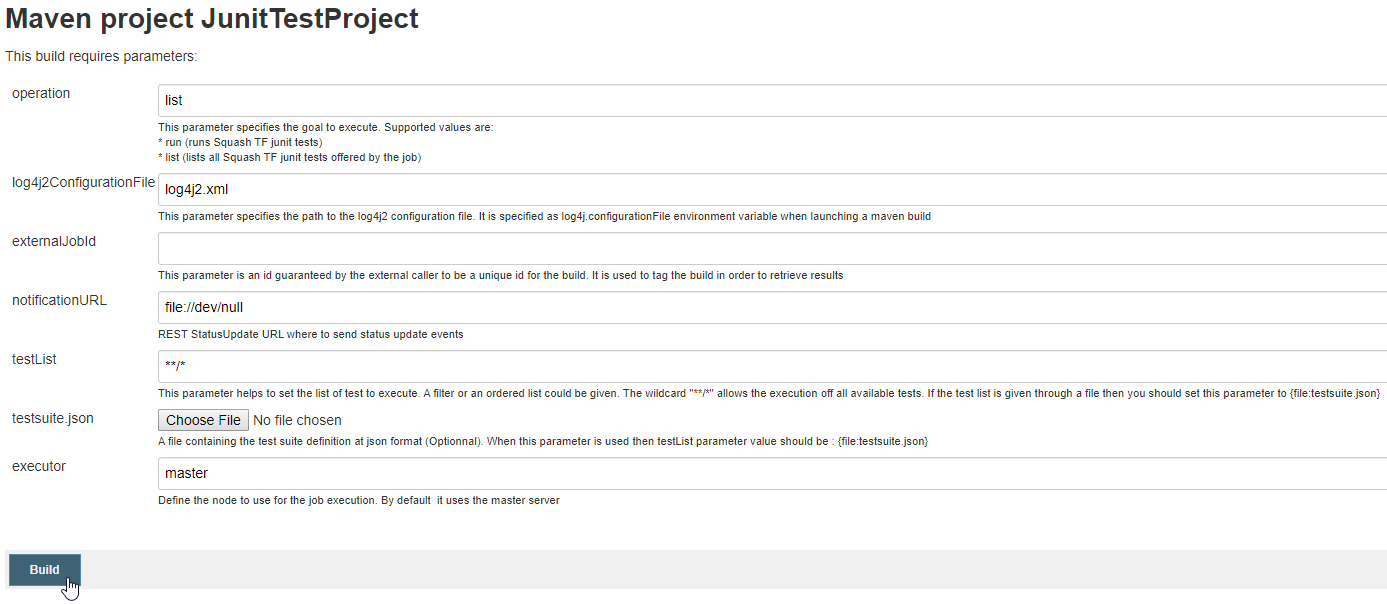
Operation and TestList
You can specify two types of goals to execute in the ‘operation’ field: list or run.
> list : This will generate a json file listing all the tests present in your project.
This file is used by Squash TM in the context of the TM-TF link to determine the tests that can be executed.
> run : This will run all the tests specified in the ‘testList’ field or in a user created json file.
If you are using the TM-TF link, Squash TM will generate and transmit to Squash TF a testsuite.json file containing the list of tests to execute. In that case you don’t have to alter the field ‘testList’ or specify a json file.
Otherwise, if you want to provide manually to your run the list of tests to execute, you can procede in two ways :
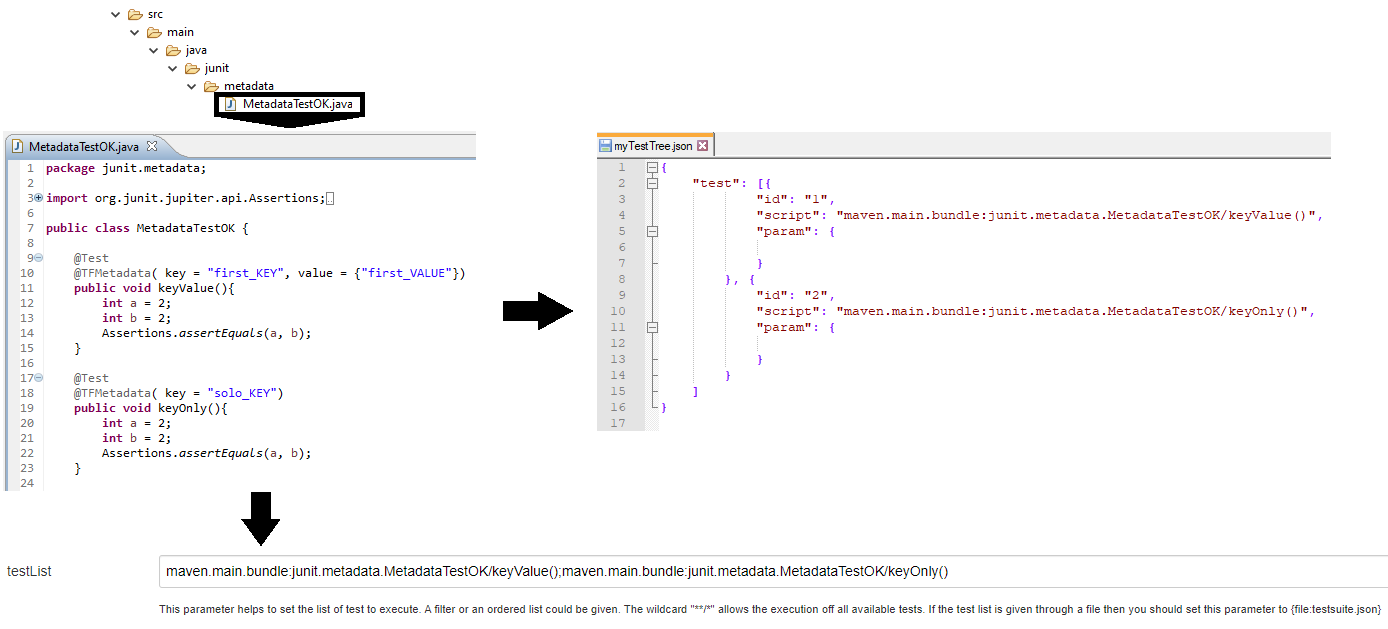
Enter the path to the tests you wish to execute (see this page for details on Junit tests naming scheme), separated by a semicolon (and no space after the semicolon), in the ‘testList’ field. You can also have the build execute all the tests present in you project, using : **/*.
Provide a json type file (by clicking on the ‘Choose File’ button on the ‘testsuite.json’ line) containing the list of tests you wish to execute, and fill the ‘testList’ field with : {file:testsuite.json}.
Exemple of each method :
Executor
If you want to launch the build on an Squash TF agent located on a distant machine and properly configured (see this page for the agent installation), enter the exact name of the agent, or its label, in the ‘executor’ field. Click on the ‘Show nodes’ button on the bottom right of the field to validate that you’ve entered a correct name :

Launching a build
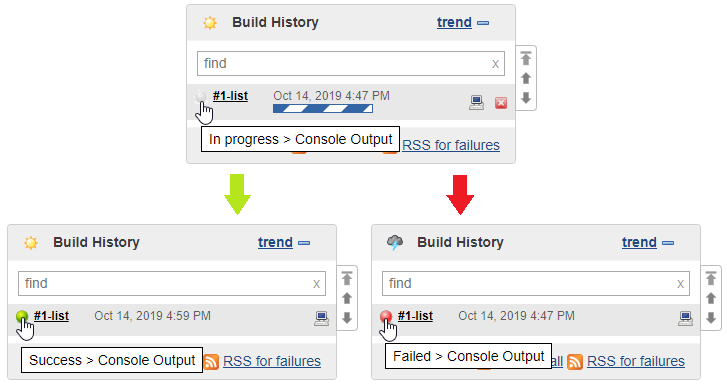
Once you’ve specified the parameters of your build, click on the ‘Build’ button to launch the build.
Clicking on the dot (grey, red or green depending on the status of the build) next to the build name in the ‘Build History’ window will show the console output.
Build outputs
Test list
After the first list build has been performed, the generated ‘Test_list’ of the last list build executed will be available on the job’s page :
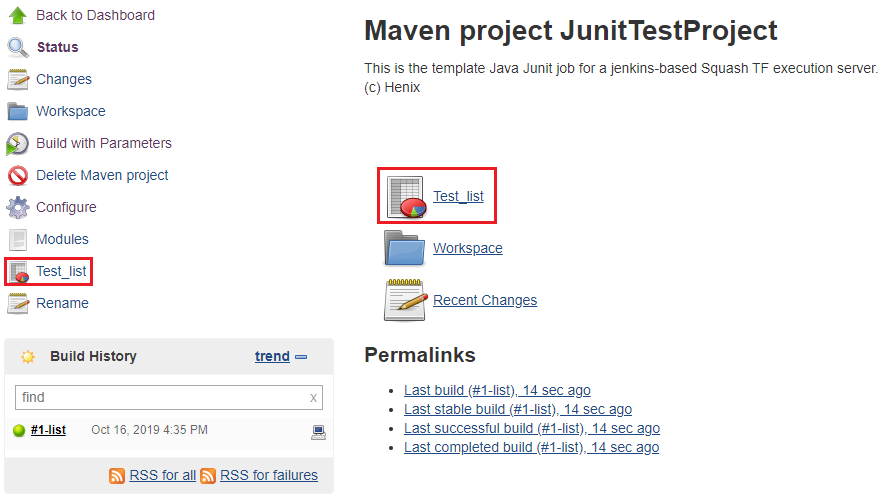
This is the json file fetched by Squash TM if using the TM-TF link.
HTML reports
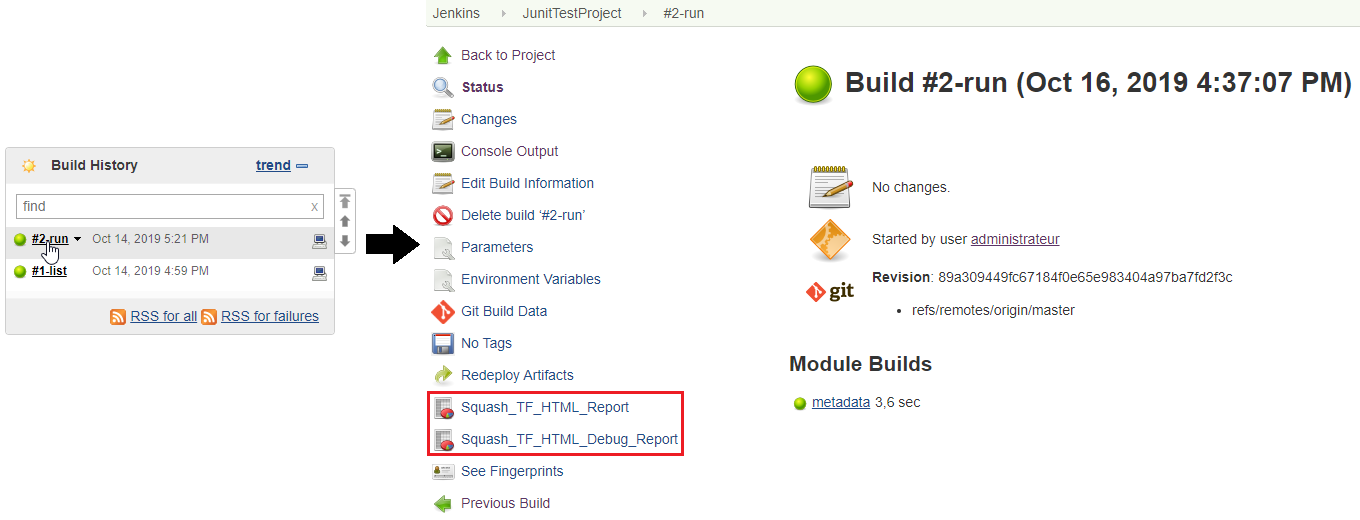
In the same manner, the generated ‘Squash_TF_HTML_Report’ and ‘Squash_TF_HTML_Debug_Report’ of the last run build executed will be available on the job’s page :

If you click directly on a run build’s name, you’ll have access to its page with the corresponding run’s HTML reports :
Note
For more indepth details about the Junit runner, please consult its dedicated section.